- Published on
Open a New Window without Triggering Pop-up Blockers
TLDR? Skip to the end or check out the demo
A few years ago, I worked on a product made up of two apps: the customer-facing app and an app for users within our company (like sales, customer success, developers, and QA). This second app was used for various admin tasks, like checking on the status of the customer app, adding and disabling users, and toggling feature flags. One feature we wanted to add was the ability to login into the client app as one of our users. This feature would make many peoples' lives easier, especially the developers. Signing in to the front-end app--even in a dev environment--required two-factor authentication, while the internal tool only needed us to be on the company VPN.
Here's the flow that we want:
- An admin signs in to the internal app and sees a list of users
- The admin selects a user and clicks a button to sign in to the main app as that user
- The front-end initiates a request to the server to generate an auth token for that user that the app will recognize
- Once the request finishes, we send the admin to the main app with the auth token attached
Easy, right? But here's the catch: in step 4, we want the main app to open in a new window. That way, when the admin is done with that user, they can quickly return to the admin app without guessing how many times they need to hit the back button.
Here's how my initial implementation looked:
import { getUserToken } from './api'

export function OpenUser({ userId, name }: { userId: number; name: string }) {
  return (
    <button
      onClick={async () => {
        const token = await getUserToken(userId)
        window.open(`${process.env.APP_URL}/login?token=${token}`, '_blank')
      }}
    >
      Log in as {name}
    </button>
  )
}
But the first time I tested it, I ran into a problem pretty quickly.
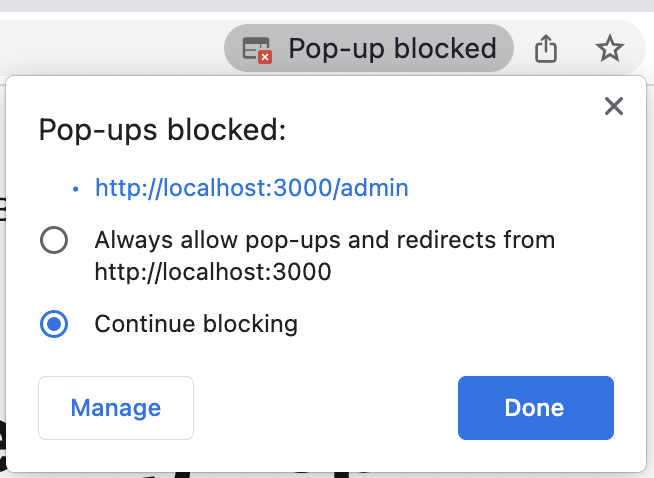
Pop-up Blockers
Here's the problem: if we wait and open the new window after we've received the
auth token, there's a chance that the browser will think the new window is a
pop-up and block it. How exactly does the browser decide? It depends on the
browser, and the criteria can even change from version to version. Still,
there's a general rule of thumb that you can use: actions initiated by the user
are allowed, and actions initiated by the app aren't. But despite the user
initiating this request, most browsers caught it anyway. After some "very
scientific" experiments1, we concluded that the primary factor was the
delay between when the user clicked the button and when we finally opened the
window that triggered the pop-up blockers. The form below is a rough
reproduction of the experiment that we put together. You can open a new window
with either window.open() or a button that manually submits a form set up to
open a new window on submission. You can also adjust the amount of time to wait
before attempting to open the window.
If you open this page in a few browsers, you may notice that they have different criteria for blocking. For example, when I wrote this, Firefox and Chrome were pretty forgiving, allowing 5 seconds before they blocked the new window. Safari, however, was much more strict, and even a delay of one second was enough to stop the window opening.
Now, we could just tell all of our admins that they should stick to Chrome or Firefox, but we can't ask the same of our customers. And if our customers can use Safari, our developers and QA engineers need to use it. So what do we try next?
Open the Window Immediately
We know that we can open the window as soon as someone clicks on the button. But how can we do that if we need to wait for the auth token? The trick is to send the user to a temporary page while you wait and save a reference to the window so you can update its location later:
import { getUserToken } from './api'

export function OpenUser({ userId, name }: { userId: number; name: string }) {
  return (
    <button
      onClick={async () => {
        const w = window.open('/login-as', '_blank')
        const token = await getUserToken(userId)
        w.location.href = `${process.env.APP_URL}/login?token=${token}`
      }}
    >
      Log in as {name}
    </button>
  )
}
export default function LogInAs() {
  return (
    <div className="flex h-full flex-col items-center justify-center">
      <div className="h-12 w-12 animate-spin rounded-full border-4 border-blue-400 border-t-transparent" />
      Signing you in...
    </div>
  )
}
You can try this yourself in
the demo I put together.
The significant bit is in the
LoginAsGet
component. Because I'm using react-router for routing, I only had to build a
placeholder route that shows a spinner and sends the user there while waiting
for the token. Once I have it, I can update the window's location.href
property. If your login method uses a GET request, you're all done! Sadly, I
wasn't.
Another Twist
Our auth server only accepted POST requests, so changing the window's location wouldn't work. Instead, I could make the placeholder route I built a little more flexible by watching the URL's query string and starting its own POST request when it had all the data.
import * as React from 'react'
import { useSearchParams } from 'remix'

export default function LogInAs() {
  const form = React.useRef<HTMLFormElement>(null)
  const [searchParams] = useSearchParams()
  const token = searchParams.get('token') ?? ''

  React.useEffect(() => {
    if (token) {
      form.current?.submit()
    }
  }, [token])

  return (
    <div className="flex h-full flex-col items-center justify-center">
      <div className="h-12 w-12 animate-spin rounded-full border-4 border-blue-400 border-t-transparent" />
      Signing you in...
      <form ref={form} action={`${process.env.APP_URL}/login`} method="post">
        <input type="hidden" name="token" value={token} />
      </form>
    </div>
  )
}
Then, I could add all the necessary info to the query string in the button handler and let the placeholder route take it from there.
import { getUserToken } from './api'

export function OpenUser({ userId, name }: { userId: number; name: string }) {
  return (
    <button
      onClick={async () => {
        const w = window.open('/login-as', '_blank')
        const token = await getUserToken(userId)
        w.location.href = `/login-as?token=${token}`
      }}
    >
      Log in as {name}
    </button>
  )
}
We actually found a few benefits to this pattern. By updating LogInAs to
dynamically build the form based on any properties in the query string, we could
reuse this route for testing SSO. It also made error handling straightforward.
We could include an error property in the query string if we got an error
response from the auth server.
import * as React from 'react'
import { useSearchParams } from 'remix'

export default function LogInAs() {
  const form = React.useRef<HTMLFormElement>(null)
  const [searchParams] = useSearchParams()
  const token = searchParams.get('token') ?? ''
  const error = searchParams.get('error') ?? ''

  React.useEffect(() => {
    if (token) {
      form.current?.submit()
    }
  }, [token])

  return (
    <div className="flex h-full flex-col items-center justify-center">
      {error ? (
        <div>
          <h1 className="text-2xl text-red-500">
            An error occurred while signing you in.
          </h1>
          <p className="text-gray-500">{error}</p>
        </div>
      ) : (
        <>
          <div className="h-12 w-12 animate-spin rounded-full border-4 border-blue-400 border-t-transparent" />
          Signing you in...
          <form
            ref={form}
            action={`${process.env.APP_URL}/login`}
            method="post"
          >
            <input type="hidden" name="token" value={token} />
          </form>
        </>
      )}
    </div>
  )
}
Conclusion
To sum up, here's the general formula:
- Open the new window as soon as your user initiates the action, set the location to a "loading" placeholder, and keep a reference to the window.
- Make the async request (whatever it may be).
- Once the request resolves, update the new window's location.
Bonus: Detect if Your Window was Blocked Anyway
If you want to be extra safe, you can check if the browser still blocked your window so you can tell your user what to do next (like how to disable the blocker or show the blocked window). Again, different browsers have different support for this, but this solution worked when I put together my "experiment" above. However, I can't guarantee that it will always work.
function popUpWasBlocked(popUp: Window | null) {
  return !popUp || popUp.closed || typeof popUp.closed === 'undefined'
}

const w = window.open('/login-as', '_blank')
if (popUpWasBlocked(w)) {
  // handle the error
}
Footnotes
-
Not actually scientific, but at least they were reproducible. ↩